

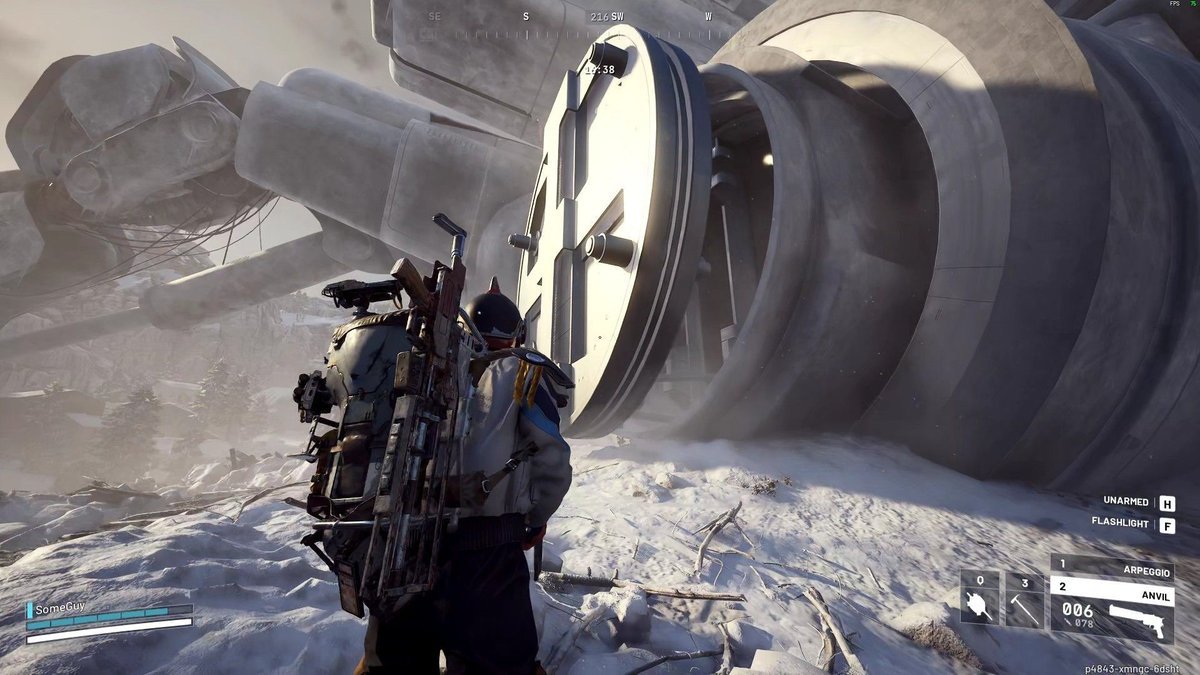
The Frozen Trail update for ARC Raiders introduces the Fallen Emperor, a colossal structure on the new Pendola Pass map that contains valuable loot for players willing to brave its interior. Reaching the treasure inside requires completing a series of challenges, puzzles, and combat encounters that demand preparation and skill.
Obtaining the Emperor Gateway Conduit
The Fallen Emperor's entrance sits at the base of the structure, but a locked door prevents immediate access. To open it, players must craft the Emperor Gateway Conduit, a device that serves as the key to entering the massive beast.
Currently, there is only one confirmed method to obtain the Emperor Gateway Conduit: participating in Redirection events on Pendola Pass. These events occur exclusively on this map, so players must plan accordingly if they want to gather the necessary components. The event can be repeated multiple times, making it possible to collect all required materials through persistence.
The Redirection Event Process

When players spawn on Pendola Pass, they will notice red lights shooting into the sky at various locations. Using the map, players can distinguish between actual Redirection events and signals activated by other Raiders. Small static icons on the map mark the permanent event locations, which become highlighted when active and emit a signal skyward.
Once an event activates, time becomes critical. Players must reach the location quickly and retrieve the Emperor Beacon, which can then be assigned to a quick-use slot. The next step involves finding a safe, flat area near cover or shelter to deploy the device.

Immediately after deployment, wreckage begins falling from the sky. Players should position themselves under or inside nearby structures to avoid being crushed by debris. Several pieces crash down around the deployment area, with the most important fragment appearing in the center where the device was placed.
To craft the Emperor Gateway Conduit, players need to complete the Redirection event enough times to collect three specific components: the ARC Plated Coupler, ARC Conductive Coupler, and ARC Insulated Coupler. If the blueprint does not drop on the first attempt, players can repeat the event by waiting at the location for it to activate again. Multiple completions are typically necessary to gather all pieces.
Once all components are collected, players should return to their base and craft the Emperor Gateway Conduit. Before heading to the Fallen Emperor, bringing a Grappling Hook is highly recommended, as it simplifies navigation through the interior challenges.
Unlocking and Entering the Structure
With the Emperor Gateway Conduit in hand, players must travel across Pendola Pass to the Fallen Emperor's base, located at the edge of a town where the structure has crashed. The entrance is visible from a considerable distance away. Players should move quickly to maximize the time available for exploring the interior.
At the base of the door sits a key slot designed for the Emperor Gateway Conduit. Activating the device causes the door to open slowly with considerable noise, alerting every player on the map to the action. This moment presents a significant vulnerability; players may face PvP encounters or, ideally, find cooperative teammates before proceeding inside. The challenges ahead are demanding, and having additional support can make the difference between success and failure.
Interior Layout and Navigation
Inside the Fallen Emperor, difficulty escalates dramatically compared to the surface. The interior contains numerous challenges, dangerous artificial intelligence enemies, and complex puzzles. The structure is organized into distinct rooms separated by challenges, and players must complete five rooms before reaching the final loot area.
After passing through the initial piston elevator room, players can encounter the remaining rooms in any order. Navigation should prioritize doors marked with blue lights, as white or yellow-lit doors lead only to shortcuts and dead ends. Ammo conservation becomes important, as players will face multiple difficult encounters.
The Electric Opening Room
Upon entering, players immediately encounter hallways lined with crates that emit electricity. Attempting to loot these boxes results in damage and movement slowdown, making them dangerous traps rather than valuable targets. At the hallway's end, a Hydra ARC emerges and unleashes rapid gunfire.
Players can use environmental cover to gradually damage the Hydra until it explodes, but this enemy should not consume excessive resources. Conserving ammunition is crucial, as more formidable enemies await deeper inside.
The Piston Elevator Room
This chamber introduces actual puzzle mechanics requiring ammunition and observation. A large piston-like structure dominates the center of the room, marked by four yellow glowing lights. Shooting all four causes additional yellow lights to appear around the room; these must also be destroyed.
Once all lights are eliminated, electricity disappears from the piston, allowing players to ride it upward. The piston carries players to a middle level, where they must ride it a second time to reach the next section. This room represents significant progress toward the interior's depths.
The Container World Room
This chamber presents navigation challenges due to its identical stacked containers filling the space. Players must locate yellow lights scattered throughout the room and shoot them while avoiding or eliminating ARCs hiding among the containers. The lights may spawn in different locations on each visit, requiring constant vigilance.
After destroying four yellow lights, a container stack in the center descends to floor level. Players can board this stack, which then rises through a hole in the ceiling, depositing them into the next room.
The Gas Trap Room
Entering this room triggers gas to fill the space immediately. While the gas itself causes no damage, it severely restricts movement speed. Players must navigate toward a large circular opening at the hallway's end, but walls begin closing in shortly after arrival. Crouching near the center hole allows players to avoid being crushed.
Passing through the circular opening reveals glowing devices on both sides that players should not touch, as they explode in chain reactions. Players must move to either side of the room and locate the moving walls' rear section through a doorway. From there, running toward the opposite side while ducking and climbing over obstacles leads forward.
Climbing the cylindrical structure provides access to a higher point necessary for jumping into the next section. Containers with blue lights in this upper area contain valuable loot without explosion risks. Containers with orange lights will countdown before detonating and should be avoided entirely.
The upper section spawns up to three Hydra ARCs, but players equipped with a Grappling Hook can bypass these encounters entirely. The final objective involves reaching the black bar near large moving machines, then climbing to the left-hand door.
The Laser Room
This chamber presents the most dangerous obstacle in the entire raid. Two laser systems deal significant health damage upon contact, potentially ending runs instantly without careful navigation. One laser rotates around the room with static outer lasers and a center set that moves inward and outward.
Players should use environmental containers and objects to block ground-level lasers, then advance when the center laser set retracts inward. Precise timing allows safe passage to the opposite side with minimal damage.
The Cylinder Climb Room
Players must climb a cylindrical chamber containing large machines attached to walls. Some machines feature electrical fields that prevent direct contact. Players can shoot these machines while jumping and landing on them; the electrical effect electrocutes without causing damage, but players have only seconds to reach the next machine.
Reaching the opposite side and taking the ladder upward leads to the next section. Falling in this room can result in death without recovery opportunities, making careful climbing essential.
The Container Maze Room
This straightforward chamber requires players to navigate a maze of containers to reach the exit. While some paths are blocked, staying toward the room's sides eventually reveals the exit passage. This room offers respite from the intense combat and puzzle challenges of previous chambers.
The Loot Room and Extraction
The final chamber rewards players with valuable loot, though time pressure remains significant after the lengthy journey. Players should prioritize blue-lit containers for superior items and higher quantities. The large center hole poses an ongoing threat, as dangerous ARCs like the Vaporizer can emerge from below.
Extraction occurs through two methods: climbing directly out of the center hole or shooting six yellow lights on either side of the room to open side doors. The side doors eject players onto the Fallen Emperor's exterior, providing a direct path home. Completing this raid with teammates significantly increases success chances compared to solo attempts, though the PvEvP environment means cooperation carries inherent risks.